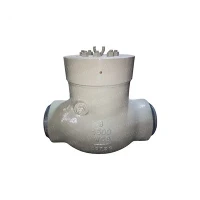
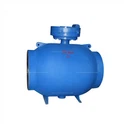
As a seasoned supplier of Steam Wedge Gate Valves, I understand the critical importance of accurately adjusting the opening and closing positions of these valves. Proper adjustment ensures optimal performance, prevents leakage, and extends the service life of the valves. In this blog post, I will share some valuable insights and practical tips on how to adjust the opening and closing positions of steam wedge gate valves effectively.


Understanding Steam Wedge Gate Valves
Before delving into the adjustment process, it's essential to have a basic understanding of steam wedge gate valves. These valves are designed to control the flow of steam in various industrial applications, such as power generation, chemical processing, and heating systems. They feature a wedge-shaped gate that moves up and down to open or close the valve. When the gate is fully lowered, it seals against the valve seats, preventing the flow of steam. When the gate is fully raised, it allows steam to pass through the valve.
There are different types of steam wedge gate valves available, including Manual Wedge Gate Valves, Alloy Steel Wedge Gate Valves, and Electric Wedge Gate Valves. Each type has its own unique features and advantages, and the adjustment process may vary slightly depending on the specific valve model.
Tools Required for Adjustment
To adjust the opening and closing positions of steam wedge gate valves, you will need the following tools:
- Wrenches: A set of wrenches is required to loosen and tighten the nuts and bolts on the valve.
- Screwdrivers: Depending on the valve design, you may need a screwdriver to adjust the position of the valve stem or the limit switches.
- Feeler Gauges: Feeler gauges are used to measure the clearance between the valve gate and the valve seats.
- Torque Wrench: A torque wrench is used to tighten the nuts and bolts to the specified torque value.
- Calipers: Calipers are used to measure the dimensions of the valve components, such as the valve stem diameter and the gate thickness.
Preparation Before Adjustment
Before starting the adjustment process, it's important to take the following precautions:
- Shut Off the Steam Supply: Ensure that the steam supply to the valve is completely shut off to prevent any accidents or injuries.
- Relieve the Pressure: Open the drain valve to relieve the pressure in the valve and the pipeline.
- Cool Down the Valve: Allow the valve to cool down to a safe temperature before proceeding with the adjustment.
- Inspect the Valve: Check the valve for any signs of damage or wear, such as cracks, leaks, or corrosion. Replace any damaged components before adjusting the valve.
Adjusting the Opening Position
The opening position of a steam wedge gate valve refers to the position of the valve gate when it is fully open. To adjust the opening position, follow these steps:
- Loosen the Locking Nuts: Use a wrench to loosen the locking nuts on the valve stem. These nuts are used to secure the valve stem in place.
- Adjust the Stem Position: Turn the valve stem clockwise or counterclockwise to adjust the position of the valve gate. Use a feeler gauge to measure the clearance between the valve gate and the valve seats. The clearance should be within the specified range.
- Tighten the Locking Nuts: Once the desired opening position is achieved, tighten the locking nuts on the valve stem to secure the valve stem in place.
- Check the Opening Position: Open the valve fully and check the opening position using a caliper or a ruler. The opening position should be within the specified range.
Adjusting the Closing Position
The closing position of a steam wedge gate valve refers to the position of the valve gate when it is fully closed. To adjust the closing position, follow these steps:
- Loosen the Locking Nuts: Use a wrench to loosen the locking nuts on the valve stem. These nuts are used to secure the valve stem in place.
- Adjust the Stem Position: Turn the valve stem clockwise or counterclockwise to adjust the position of the valve gate. Use a feeler gauge to measure the clearance between the valve gate and the valve seats. The clearance should be within the specified range.
- Tighten the Locking Nuts: Once the desired closing position is achieved, tighten the locking nuts on the valve stem to secure the valve stem in place.
- Check the Closing Position: Close the valve fully and check the closing position using a caliper or a ruler. The closing position should be within the specified range.
Adjusting the Limit Switches
In addition to adjusting the opening and closing positions of the valve gate, you may also need to adjust the limit switches on the valve. Limit switches are used to control the movement of the valve gate and to prevent it from overtraveling. To adjust the limit switches, follow these steps:
- Locate the Limit Switches: The limit switches are usually located on the valve actuator or the valve body. Refer to the valve manual for the exact location of the limit switches.
- Adjust the Switch Position: Use a screwdriver to adjust the position of the limit switches. The switches should be set to stop the valve gate at the desired opening and closing positions.
- Test the Limit Switches: After adjusting the limit switches, test the valve to ensure that the limit switches are working properly. Open and close the valve several times and check that the valve gate stops at the desired positions.
Testing and Verification
Once the adjustment process is complete, it's important to test and verify the performance of the valve. To do this, follow these steps:
- Open the Steam Supply: Slowly open the steam supply to the valve and check for any leaks or abnormal noises.
- Test the Valve Operation: Open and close the valve several times to ensure that it operates smoothly and that the opening and closing positions are accurate.
- Check the Flow Rate: Use a flow meter to measure the flow rate of the steam through the valve. The flow rate should be within the specified range.
- Monitor the Valve Performance: Monitor the valve performance over a period of time to ensure that it continues to operate properly. Check for any signs of wear or damage and make any necessary adjustments.
Conclusion
Adjusting the opening and closing positions of steam wedge gate valves is a critical task that requires careful attention to detail. By following the steps outlined in this blog post, you can ensure that your valves are adjusted correctly and that they operate efficiently and safely. If you have any questions or need further assistance with valve adjustment, please don't hesitate to contact us. We are a leading supplier of Steam Wedge Gate Valves and have extensive experience in valve installation, maintenance, and repair. We would be happy to help you with all your valve needs.
References
- Valve Manufacturer's Manual
- Industrial Valve Handbook
- ASME Boiler and Pressure Vessel Code